
The tile floor transforms the entire kitchen and bathroom space through its immediate visual effect. The material has an organized appearance and excellent durability while it outperforms most other materials for water resistance. The initial steps of the process present difficulties for users to understand. The process requires more than simply applying tiles to the floor.
Planning Your Perfect Space
A fresh bathroom floor adds value to any home. That’s why choosing the right type of tile is important. You must choose materials that handle moisture well.
For instance, natural stone looks beautiful but needs care. In addition, ceramic options are cheaper and resist water easily. Also, proper planning ensures your beautiful new tiles won’t crack. Careful planning not only saves a lot of money but also reduces stress during actual work.
Gathering the Necessary Tools
You need specific items before starting this big project. First, get a strong backer board to support everything. This base layer keeps the structure completely solid. Next, a good tile cutter makes shaping the pieces simple.
Additionally, small tile spacers keep every gap perfectly even. You also need a soft rubber mallet to tap pieces. Therefore, having these tools ready prevents frustrating delays later. Besides these items, grab a bucket and some mixing tools. Here is a simple list of required materials:
- Strong cement board for the solid base.
- Quality mortar to hold the pieces tight.
- A reliable tape measure for perfect accuracy.
- Clear safety glasses to protect your eyes.
- A sturdy trowel for spreading the paste.
Preparing the Ground Level
A smooth surface is essential for installing tiles correctly. Consequently, you must clean the subfloor very thoroughly first. Dirt and dust will ruin the sticky mortar paste. Then, secure the board tightly to the wooden base below. After that, finding the center of the room is crucial.
Therefore, snapping clear chalk lines helps guide the entire process. These lines act as a map for your hands. Furthermore, a proper tile layout prevents awkward tiny cuts later. Also, testing the pattern completely dry saves much trouble. Thus, you see how the final design will look. Fixing mistakes is very easy before the paste dries.
Putting the Pieces Down
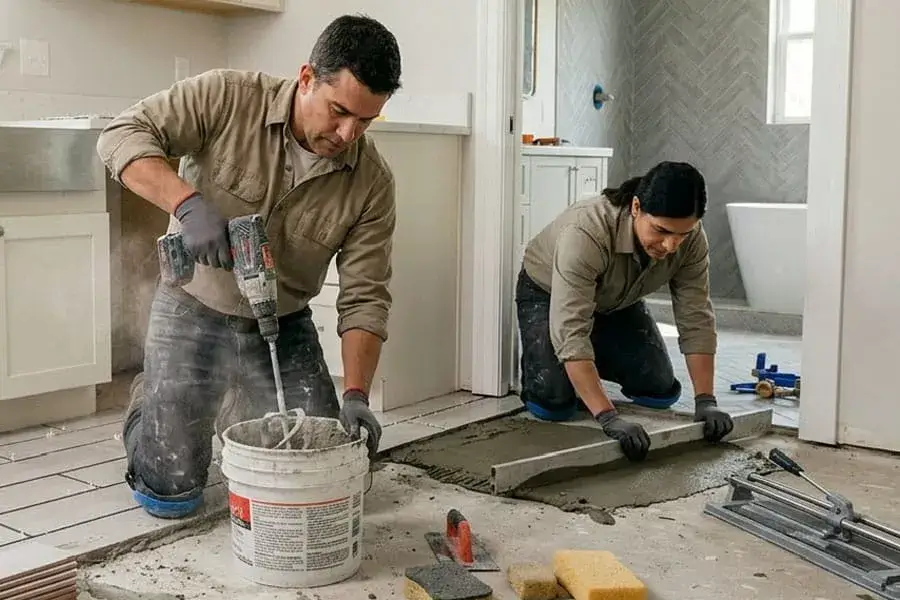
The tile installation process starts with an enjoyable phase. First, mix the mortar until it reaches peanut butter’s consistency. The next step involves applying a small amount of material to the floor through controlled application. Then, press the first piece firmly into the wet paste. Additionally, use the mallet to gently tap it into place. Put the plastic spacers in every single corner immediately. Therefore, every single grout line will stay perfectly straight.
Sometimes, cutting tile is necessary for the room edges. Consequently, measure twice before slicing any expensive pieces. Keep checking that everything stays totally level throughout. Moreover, a flat surface just looks much more professional.
Adding the Final Touches
You must wait a full 24 hours before walking anywhere. After that waiting period, removing all plastic spacers is required. Next, mix the colored grout according to the package directions. You should use a float tool to apply the mixture across the empty spaces. The tool should be operated at a 45-degree angle to achieve optimal performance.
Consequently, this angle pushes the paste deeply into the cracks. The process requires clean damp sponge materials to use for surface cleaning after ten minutes have elapsed from the first application. Rinse the sponge frequently to avoid spreading a cloudy film. The dry surface requires polishing through the use of a soft cloth which will be done later.
Small Mistakes That Can Cause Big Problems
Even a simple job can go off track without care. While installing tiles, small slips can lead to bigger issues later. Here are a few things to watch for:
- Skipping prep before tile floor installation
- Not using tile spacers, which leads to uneven lines
- Rushing through drying time
- Poor planning of the tile layout
- Using the wrong tool for cutting tile
One case stands out. A homeowner once tiled a small kitchen over an uneven base. At first, it looked fine. A few months later, cracks began to show near the stove. The issue came from the base, not the tile.
FAQs
1. How long does tile floor installation take?
Most projects take two to three days. One day for prep and placing tiles, one for drying, and another for grout and final cleaning.
2. Can tiles go over an old floor?
Yes, but the surface must be strong and level. Adding a backer board can help create a better base before new tiles are placed.
3. What tools are needed for installing tiles?
Common tools include a tile cutter, tile spacers, trowel, and rubber mallet. A level and tape measure also help keep everything straight.
4. How do you clean grout after installation?
Use a damp sponge to remove excess grout. Wipe gently in stages. This helps clean the surface while keeping the grout lines full.
5. What is the best tile for a bathroom floor?
Tiles with grip work best. Many choose porcelain or textured natural stone since they reduce slips and hold up well in wet spaces.
Let’s Create a Space That Feels Just Right!
A tile floor should feel solid underfoot and look clean every day. Careful prep, steady work, and the right choices all come together in the end. Each step, from planning to grout, shapes the final result. The Floor Store helps make those choices easier. With the right support and materials, building a lasting floor becomes a smoother and more rewarding process.